Adding a ‘string to the bow’ of property professionals – Creating floor plans and using floor plan software
4th May 2021
This blog post has been written by zPlan. Made Snappy has partnered with zPlan to help Estate & Letting Agents create floorplans for their Virtual Tours.
Floor plans illustrate to prospective buyers the basic layout and measurements of the property in a “bird’s eye view”. They offer a look and feel to the property alongside photographs and are a critical piece of marketing for Estate Agents. Often floor plans will display the habitable spaces within the property, room by room dimensions, windows and doors, and on the more detailed plans the location of major appliances.
Being adept in producing floor plans can certainly add another string to the bow of a property professional and can be produced alongside a virtual tour. Continue reading for the basics on floor plan creation – including tips, a digital floor plan software video, and information on more formal training.
Things you require to complete a floor plan:
Laser Measure – This is required to get your measurements. You could use a tape measure, but using a laser measure will save you time and be more accurate.
Pencil – This might sound obvious, but a pencil over a pen is important so you can correct mistakes.
Graph Paper – This allows you to draw your basic plan to some sort of scale, so your measurements are accurate when you transfer from paper to software.
Clipboard/Folder – This is simply something to lean on. It allows you to be comfortable whilst drawing your plan. The more comfortable, the less likely you are to make mistakes.
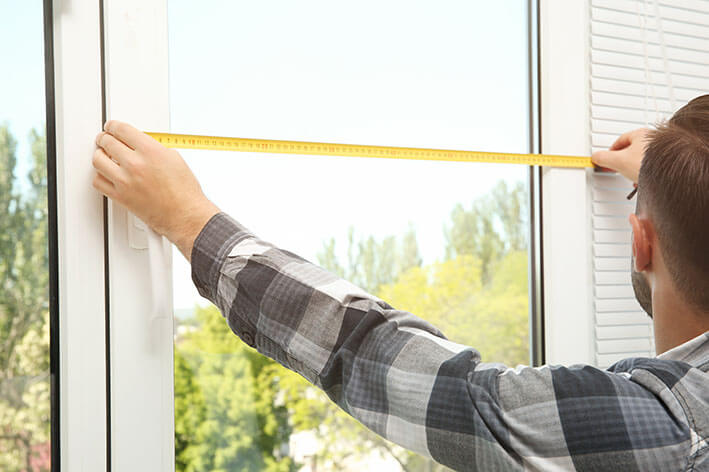
Tape Measure – Laser Measurers are great for long-distance, but small distances may need a tape measure (e.g. window sizes).
Compass – This is so you can work out which direction the property faces (this is important to prospective buyers).
Torch – This is so you can accurately measure any unlit areas.
RICS Measuring Guidance – This is crucial to ensure accuracy and consistency amongst property surveyors and floor planners. It’s not crucial for every job, but you should read this document before offering floor plan services.
zPlan App/Desktop Software – The only way to ensure your plan can be given in a presentable format for your clients. It works out measurements and allows for icons such as utilities and personalisation such as logos and colors.

The basics of floor plan creation:
When creating floor plans, it is important to ensure you are as accurate as possible. In a booming housing market where house prices are on the rise, the size of the property is crucial to buyers and even 1 square metre out can affect the price of a property.
Below is a step-by-step guide on how best to carry out an accurate floor plan. This method is based on drawing a plan by hand and transferring this to desktop digital software. Whilst many of the principles remain the same, if you are using an app directly, some steps may not be necessary:
Prior to entering the property, ensure you have all of the necessary equipment mentioned above and they are in good condition. Test your laser measure’s batteries, calibrate it if needed, and set it to measure from the front or back of your device.
1. When you first enter the property, walk around and get your bearings. It is important to understand what difficulties you may come across, where you may need to take care, and where all your main walls are.
2. The first measurement you should take is the length and width of the property. This does not have to be 100% accurate but will give you a rough idea of the floor area and enable you to understand how much graph paper you will need and to what scale you will have to draw your plan.
3. Once this has been done, it is time to measure each room accurately. Always take your first measurement from a corner of the house, preferably on an external wall, and measure to 3 decimal places. This gives you an edge to your plan, so you know from which point to continue measuring the other rooms.
4. Measure the length and the width of the room first. Place your laser measure on the wall and ensure it is flat and unobstructed. To ensure stability place at around waist height. The majority of the rooms you come across will be square or rectangle, however, for those which are not, you must measure the length of every wall.
5. Once your walls for the room are in place, it is now time to draw on your windows/doors/any other bits within the room. These must be done accurately as it gives the potential buyer/renter an idea of how much sunlight they may get or where they may be able to put their furniture. To measure the windows, you first have to measure the distance from the edge of the wall. You may want to use a tape measure for this as some of the distances may be very small. Then, measure the distance width of the window. You do not need to do height. You can do the same for the door and any other blocks/fireplaces etc.
6. Once one room has been completed, it is best to measure from adjoining rooms. This ensures consistency with the outline of the property. Measure each adjoining room in the same way as above. You will need to take an internal wall measurement, so any software you use, such as zPlan, includes wall width. Whilst most modern properties will have small internal walls, older ones can be very thick, and be important to make sure all your room measurements add up. It may be best to use your tape measure for this.
7. When you come across the kitchen and bathroom, there will be additional measurements you need to take. You will need to measure any kitchen sides/cupboards/appliances/sinks/baths/showers/toilets in relation to the room. This is so anyone looking at the floor plan can see exactly where things are placed and can start to think about where they will perhaps put their things if they choose to proceed with the property.
8. Once you have measured all of the rooms, the only thing left to measure at this point will be the stairs. This is done by taking a simple width measurement alongside the stair “wall” length. Finally, measure from your bottom step to the wall opposite, so you know where exactly the stairs need to be placed on the plan.
9. Once you have measured all areas, you can name the rooms. There is no hard and fast rule or convention on naming rooms. Liaise with the agent who will advise on what they believe the room names should be. As long as they are clear you will have no issues.
10. The last official information you need to note is the direction in which the property is facing. Stand with your back against the front door and take out your compass. On your plan then note the direction of “North”. This is becoming more prevalent on floor plans due to the desire to have south-facing gardens, so it is important this is accurate.
11. Finally, before leaving the property, you should have another walk round and ensure there is nothing obvious you have missed. You don’t want to have to reattend for something minimal, so best to get it the first time around.

Using floor plan software
The modern way of creating floor plans is to use software that completes all the dimensions for you as well as produce a slick and often personalised digital plan. Some property professionals draw their plans by hand and then transfer this to the desktop software, whilst others draw directly using a floor plan app for tablets, such as zPlan. Either way is a great way to produce top-quality, highly informative plans for display purposes for clients such as estate agents, interior designers, and energy assessors.
Below you will see a video of zPlan in action, showing how easy it is to draw a plan ready for export:
For information on our software and a free trial – head to www.zplan.co.uk
For those Made Snappy customers who go on to subscribe to our floor plan software, you will receive 15% off subscriptions for 3 months on top of your free trial. Just use the coupon code “MADESNAPPY21”.
Additional Floor Plan Training
zPlan - through our sister company Quidos Ltd - offers online floor plan training for those who wish to gain some formal floor plan training. This training will give you a thorough introduction on how to sketch accurate domestic floor plans and convert that sketch into a digital plan ready to provide your client.
Our floor plan training course is comprised primarily of two highly informative videos and can be completed in your own time for only £89+VAT.
Made Snappy customers can get a 15% discount on this price using the code; "MADESNAPPY21"
For more information on the course and to book head here: https://quidos.co.uk/product/floor-plan-training-course-online/
Thank you for reading and good luck!

Billy Say
Technical Manager at zPlan
“Designed for property professionals who need to draw floor plans quickly and simply”
www.zplan.co.uk/


